Nail Grinding for Dogs: A Complete Safety & Comfort Guide
Discover why nail grinding is a gentler alternative to clipping, how to choose the right grinder, and step-by-step techniques to keep your dog's paws healthy — without stress or injury.
Your dog's nails are more than just a cosmetic detail — they're essential to their comfort, mobility, and long-term joint health. Overgrown nails can force an unnatural gait, cause pain, and even lead to arthritis or paw deformities. While nail clipping is the traditional method, nail grinding for dogs has become increasingly popular among pet owners and professional groomers alike.
Grinding offers a smoother finish, reduces the risk of splitting or cracking, and can be less intimidating for dogs who dislike the sharp "clip" sound. But it also requires the right tools and technique to avoid injury. This guide will walk you through everything you need to know — from selecting a grinder to mastering a stress-free session.
💡 Did You Know?
Dogs' nails are made of keratin — the same protein as human hair and nails. When you grind, you're essentially sanding down this protective layer. Unlike clipping, which creates a sharp edge, grinding leaves a rounded tip that won't snag on carpets or scratch floors.
Why Grind Instead of Clip?
Both clipping and grinding achieve the same goal — shorter, healthier nails — but they differ in method, experience, and outcome. Understanding these differences helps you decide which is best for your dog.
✂️ Nail Clipping
- Fast and efficient for experienced users
- Quiet operation (no motor noise)
- Lower upfront equipment cost
- Can split or crack thick nails
- Leaves sharp edges that need filing
- Higher risk of cutting the quick if not careful
⚙️ Nail Grinding
- Produces smooth, rounded tips
- Reduces risk of splitting and cracking
- Gradual removal — easier to avoid the quick
- Motor noise may frighten some dogs
- Takes longer per session
- Requires periodic bit replacement
For dogs with thick, brittle, or dark nails (where the quick is hard to see), grinding is often the safer choice. It's also ideal for dogs who have had bad experiences with clippers — the gradual sanding motion can feel less invasive. However, if your dog is extremely noise-sensitive, a quiet clipper might be the better starting point.
Many professional groomers use a combination approach: clip the bulk of the nail, then grind to smooth the edges. If you're unsure which method suits your dog, consult your veterinarian or a professional groomer. Our guide to nail cutting for dogs covers the clipping method in detail.
🐕 Breed Consideration: Dogs with thick, fast-growing nails — like Labrador Retrievers, German Shepherds, and Golden Retrievers — often benefit most from grinding. Small breeds with delicate nails, like Chihuahuas or Yorkies, may do better with a fine-grit grinder on a low speed.
Choosing the Right Nail Grinder
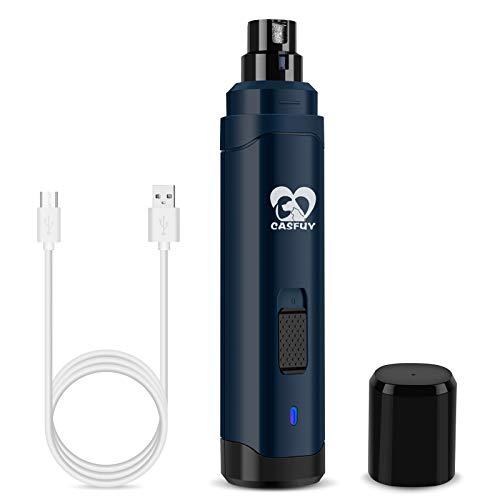
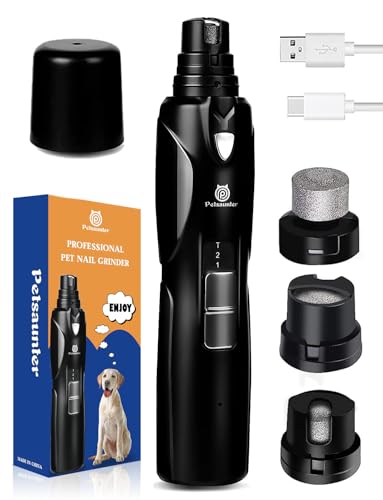
The market offers a range of pet nail grinders, from budget-friendly models to premium professional-grade tools. The right choice depends on your dog's size, nail thickness, and temperament — as well as your budget and comfort level with the equipment.
| Feature | Entry-Level | Mid-Range | Premium / Professional |
|---|---|---|---|
| Motor Speed | Single speed, often slower | 2–3 speed settings | Variable speed with precise control |
| Noise Level | Moderate to loud | Quiet operation | Ultra-quiet, low-vibration |
| Bit Type | Standard diamond bit | Diamond bit, replaceable | Multiple bit options (fine, coarse, shaping) |
| Safety Features | Basic guard | Safety guard + auto-stop | Advanced sensors, LED light, auto-stop |
| Battery Life | Short (30–60 min) | Moderate (60–90 min) | Long (90+ min) or corded option |
| Best For | Occasional use, small dogs | Regular use, medium dogs | Frequent use, all sizes, anxious dogs |
Key Features to Look For
- Quiet motor: Look for grinders advertised as "low noise" or "quiet." A noisy grinder can frighten your dog and make the experience stressful for both of you.
- Adjustable speed: Different dogs and nail types require different speeds. Thick nails need higher speed; thin nails need lower speed. Variable speed gives you control.
- Safety guard: A guard prevents the bit from going too deep and protects the quick. This is especially important for beginners.
- Replaceable bits: Diamond bits wear down over time. Choose a grinder with easily replaceable bits so you don't have to buy a whole new unit.
- Ergonomic design: A comfortable grip reduces hand fatigue during longer sessions. Cordless models offer more flexibility but require charging.
- LED light: Some premium grinders include an LED light that illuminates the nail, making it easier to see the quick — especially helpful for dogs with dark nails.
⚠️ What to Avoid:
• Grinders with very high RPMs (over 30,000) — these generate excessive heat and can burn the nail.
• Cheap models with no safety guard — the risk of injury is too high for beginners.
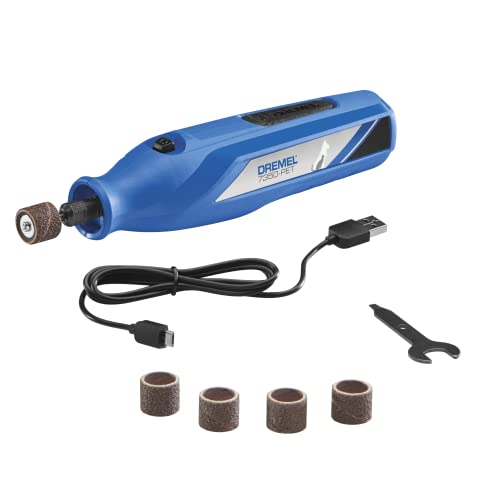
• Human Dremel tools — they run too fast and aren't designed for dog nails.
If you're looking for a reliable starting point, browse our selection of dog nail clippers and related grooming tools. For a complete grooming kit, consider pairing your grinder with a quality dog brush and gentle dog shampoo.
Step-by-Step Grinding Process
Grinding your dog's nails is a skill that improves with practice. Follow these steps to ensure a safe, comfortable experience for both you and your dog.
✅ Before You Start
- Gather all supplies: grinder, treats, styptic powder, towel
- Choose a quiet, well-lit area with a non-slip surface
- Exercise your dog first to reduce excess energy
- Have a helper if your dog is wiggly or anxious
- Check the nails for cracks, splits, or injuries
❌ Common Mistakes to Avoid
- Grinding for too long in one spot (heat buildup)
- Using too much pressure (let the tool do the work)
- Skipping the desensitization phase
- Grinding on a nervous or struggling dog
- Forgetting to reward calm behavior
The Grinding Procedure
- Prepare your dog: Position your dog comfortably — either standing on a non-slip surface or lying down. If your dog is anxious, have a helper gently hold them. Never force a struggling dog; this creates negative associations.
- Expose the nail: Gently hold the paw and press lightly on the pad to extend the nail. Start with the front paws, as they're usually easier to access.
- Turn on the grinder: Turn it on away from your dog's ear so the sudden noise doesn't startle them. Let it run for a second before touching the nail.
- Grind in short bursts: Touch the spinning bit to the tip of the nail for 1–2 seconds, then pull away. Repeat around the tip and sides. Work in small increments — this prevents heat buildup and gives you more control.
- Check the quick: After a few passes, look at the nail tip. You'll see a dark spot or a pinkish center — this is the quick. Stop before you reach it. For dark nails, grind a tiny bit at a time and check frequently.
- Smooth the edges: Once you've shortened the nail, use the grinder at a 45-degree angle to round the edges. This prevents snagging and scratching.
- Reward and repeat: Give your dog a treat and praise after each nail. Take breaks if needed. Move to the next nail only when your dog is calm.
- Clean up: Wipe the grinder bit with a damp cloth and store it safely. Check your dog's paws for any irritation.
🔥 Heat Warning: Grinders generate friction, which creates heat. Never hold the bit against the nail for more than 2–3 seconds at a time. If the nail feels warm to the touch, stop and let it cool. Overheating can cause pain and damage the nail bed.
Safety & Avoiding the Quick
The "quick" is the sensitive vein and nerve supply inside the nail. Grinding too close to it can cause pain and bleeding. For dogs with dark nails, the quick is harder to see, so extra caution is needed.
How to Identify the Quick
- Light-colored nails: The quick appears as a pinkish or reddish center. It's usually visible when you look at the tip of the nail.
- Dark-colored nails: The quick is not visible from the outside. Grind in tiny increments and look for a dark, chalky center. Stop as soon as you see a dark spot — that's the quick.
- Chalky residue: When grinding, healthy nail produces a fine, light-colored dust. If you see dark, moist-looking dust, you're getting close to the quick. Stop immediately.
What to Do If You Hit the Quick
Accidents happen, even to experienced groomers. Stay calm and follow these steps:
- Apply styptic powder: Dip the nail into styptic powder or cornstarch. Apply gentle pressure for 2–3 minutes.
- Keep your dog calm: Speak softly and offer a treat. Avoid letting your dog walk on hard surfaces immediately.
- Monitor the bleeding: Most quick bleeds stop within 5–10 minutes. If bleeding persists or your dog seems painful, contact your veterinarian.
- Prevent infection: Keep the paw clean and dry for the next few hours. Avoid walking in dirt or mud.
🩹 First-Aid Kit Essentials: Keep these items on hand for nail grinding sessions:
• Styptic powder or cornstarch
• Clean cloth or gauze
• Antibacterial wipes
• Treats for positive reinforcement
• A towel for your dog to lie on
Training Your Dog to Accept Grinding
Many dogs are initially fearful of the grinder's noise and vibration. Desensitization and counter-conditioning are the most effective ways to build positive associations. Start slowly and never force your dog to endure something they find scary.
Step-by-Step Desensitization
- Introduce the grinder while it's off: Let your dog sniff it and reward calm curiosity.
- Turn it on at a distance: Run the grinder across the room and treat your dog for staying calm.
- Move closer gradually: Each session, bring the grinder a little closer while rewarding calm behavior.
- Touch a nail briefly: With the grinder on, touch it to a nail for a split second and immediately reward.
- Increase duration slowly: Gradually increase to 1–2 seconds per nail, always rewarding.
- Practice regularly: Short, frequent sessions (2–3 minutes) are more effective than long, infrequent ones.
Tips for Anxious Dogs
- Use high-value treats that your dog only gets during grinding sessions.
- Play calming music or white noise to mask the grinder sound.
- Try a treat-dispensing toy to keep your dog distracted.
- Consider a dog anxiety wrap for mild anxiety.
- If your dog is severely anxious, consult your vet about calming aids or medication.
- Break the process into tiny steps — even one nail per session is progress.
For dogs with extreme anxiety, a pheromone diffuser in the grooming area may help create a calming environment. And if your dog's fear is related to past trauma, consider working with a professional behaviorist — our guide on when to see a behaviorist can help you decide.
Maintenance & Frequency
How often you grind your dog's nails depends on several factors: activity level, breed, age, and the surfaces your dog walks on.
📅 Frequency Guidelines
- Active dogs: Every 4–6 weeks (natural wear helps)
- Average dogs: Every 3–4 weeks
- Senior or less active dogs: Every 2–3 weeks
- Puppies: Weekly handling sessions, grind as needed
🔍 Signs It's Time to Grind
- You hear clicking on hard floors
- Nails touch the ground when standing
- Nails curve inward toward the paw pad
- Your dog's gait changes or they seem uncomfortable
Regular maintenance is key to preventing overgrowth. If you skip a session, the quick may grow longer, making it harder to shorten the nails safely. Consistent grinding keeps the quick at a reasonable length and makes each session easier.
📝 Pro Tip: Keep a nail care journal. Note the date of each grinding session and the approximate length of the nails. This helps you establish a routine and spot any changes in growth rate or nail health.
Common Problems & Solutions
Even with the best intentions, issues can arise. Here are some common problems and how to address them:
- Problem: My dog won't sit still. Solution: Exercise before sessions, use a helper, or try a grooming sling or hammock. Start with just one nail per session and build up gradually.
- Problem: The grinder is too noisy. Solution: Choose a quieter model, run the grinder in a separate room for a few minutes daily to desensitize, or try a manual file for touch-ups.
- Problem: I'm afraid of hitting the quick. Solution: Use a safety guard, grind in small increments, and always check the nail tip after each pass. For dark nails, use an LED light to improve visibility.
- Problem: The nail is getting hot. Solution: Grind for 1–2 seconds at a time, then pull away to let the nail cool. Don't press hard — let the grinder's speed do the work.
- Problem: My dog's nails are too thick for my grinder. Solution: Use a higher-speed grinder or a coarser bit. Some groomers clip the thick nail first, then grind to smooth the edges.
- Problem: The grinder bit keeps stopping. Solution: The bit may be worn or clogged. Clean it with a soft brush and replace it if necessary. Don't overtighten the bit.
If you encounter persistent problems — especially if your dog shows signs of pain or severe anxiety — consult your veterinarian or a professional groomer. They can demonstrate proper technique and recommend appropriate tools. For more grooming resources, explore our complete dog grooming guide.
Frequently Asked Questions
🐾 Your Dog Deserves Healthy Paws
Nail grinding is a skill that pays off in comfort and mobility for your dog. With the right tools, patience, and positive reinforcement, you can make nail care a stress-free part of your grooming routine. Remember: short, frequent sessions are better than long, infrequent ones. And if you're ever unsure, don't hesitate to ask your vet or a professional groomer for guidance.
For more grooming tips, explore our guides on dog bathing, dog dental care, and ear cleaning for dogs.